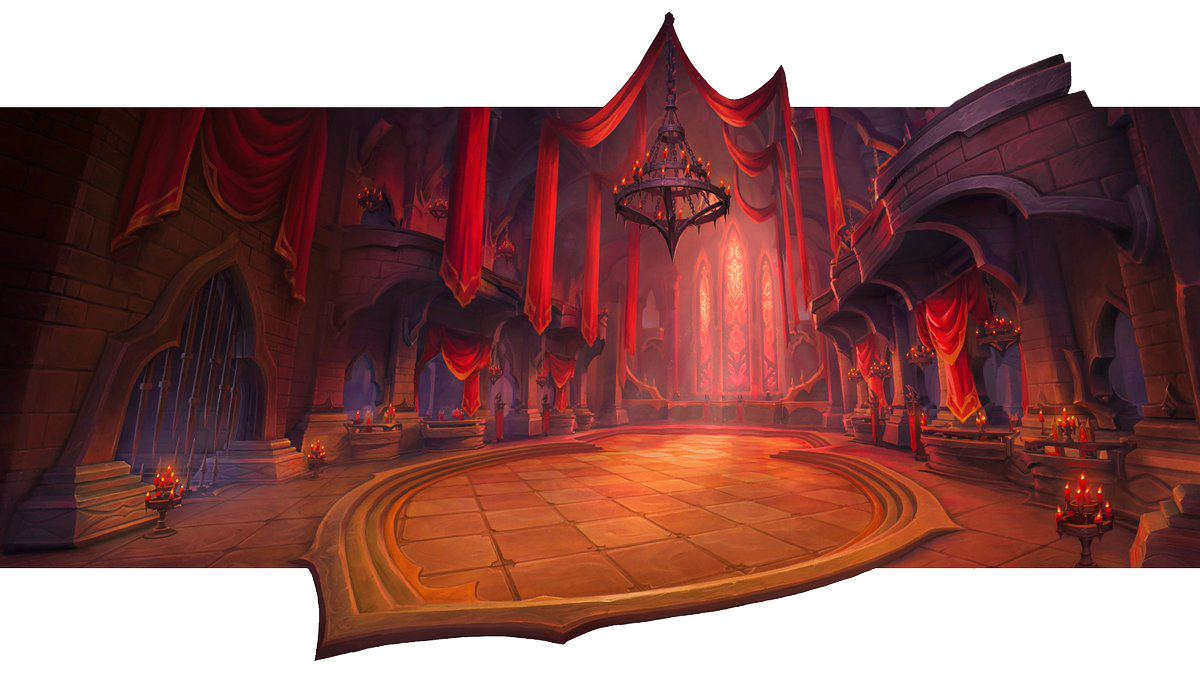
Castle Nathria
Castle Nathria is a gothic-style castle towering strong above the rest of Revendreth (Coordinates 46.2 41.2). This is the largest building in the area, with a gargoyle on the roof.
Castle Nathria Raid Release Schedule
Normal and Heroic difficulties: December 8 NA / December 9 EU
Mythic Castle Nathria, Raid Finder Wing 1: December 15 NA / December 16 EU
Raid Finder Wing 2: January 5 NA / January 6 EU
Raid Finder Wing 3: January 19 NA / January 20 EU
Raid Finder Wing 4: February 2 NA / February 3 EU
The Castle has 10 different bosses with unique abilities and for each you need to choose a strategy to defeat. You will be able to get Gothic-style armor sets unique to this castle. If you have long wanted to get a plague doctor costume, now you have such an opportunity - cloth and leather looks exactly like that. Plate armor is more reminiscent of the walking Iron Maiden or the adepts of the Inquisition.
There is a certain sequence, following which the next bosses are opened.
The first boss is Shriekwing. Killing Shriekwing unlocks Sun King's Salvation, Artificer Xy'Mox and Huntsman Altimor. Then you can choose any of them, which will open the passage to the subsequent chain of passes. You can choose defeating both Sun King's Salvation and Artificer Xy'Mox, which unlocks the Council of Blood. Or defeat Huntsman Altimor and unlock Hungering Destroyer, which then unlocks Lady Inerva Darkvein when defeated. You have to defeat both Council of Blood and Lady Inerva Darkvein and after that, you will get a chance to defeat the final three bosses - Sludgefist, next one is Stone Legion Generals and main boss - Sire Denathrius.
Castle Nathria Loot
There 4 diffirent ilvl loot - 187 LFR(Looking for Raid), 200 Normal, 213 Heroic and 226 Mythic, that you can get from the first eight bosses in the raid. Stone Legion Generals and Sire Denathrius, the two final bosses of the raid, have better loot item levels - 194 LFR, 207 Normal, 219 Heroic and 233 Mythic.
In Castle Nathria no ususal weapon drop, instead you will get Anima Spherules. These Spherules can be exchanged with your Covenant Sanctum weaponsmiths for Covenant-themed weapons.
Also, to strengthen the raid, players can use the rune - Vantus Rune: Castle Nathria. But you can only use one Rune per week for one boss.
Each boss past the first one is guaranteed to drop a Memory of the Runecarver Legendary Recipe. You can expect to get a General Memory of the Runecarver and one for each spec on your first clear.
Remember that there in Shadowlands expansion is also a system for obtaining items from the weekly chest. To receive rewards from the Great Vault, the character needs to kill a certain number of bosses from the Castle of Nathria.
Achievements
Castle Nathria have a certain amount of achievements:
Main achievements are obtained for killing bosses on any difficulty level (Normal, Heroic, Mythic).
Also there some specific achievements to get The Glory of the Nathria Raider and reward for it is the Rampart Screecher mount.
Defeat Shriekwing after she kills six Sneaky Servitors in Castle Nathria on Normal difficulty or higher.
Criteria
Sneaky Servitors killed
Redeem Kael'thas after lighting all four of the room's braziers in Castle Nathria on Normal difficulty or higher.
Criteria
Light all four braziers
Defeat the Hungering Destroyer after draining all of the large anima canisters with Volatile Ejection in Castle Nathria on Normal difficulty or higher.
Criteria
All anima canisters drained
Defeat the Council of Blood after throwing four styles of wine in Castle Nathria on Normal difficulty or higher.
Criteria
Wine thrown slain
Defeat the Stone Legion Generals while all players are carrying a Bouquet of Blooming Sanguine Roses in Castle Nathria on Normal difficulty or higher.
Criteria
Roses (General Kaal) acquired slain
Defeat Huntsman Altimor after walking Margore, Bargast, and Hecutis to the corners of The Kennels in Castle Nathria on Normal difficulty or higher.
Criteria
Margore's business handled slain
Bargast's business handled slain
Hecutis' business handled slain
Defeat Artificer Xy'mox after returning loose Maldraxxus, Ardenweald, and Maw Anima to their display cases in Castle Nathria on Normal difficulty or higher.
Criteria
Maldraxxus anima returned
Maw anima returned
Ardenweald anima returned
Defeat Lady Inerva Darkvein after defeating the Dark Animus in Castle Nathria on Normal difficulty or higher.
Criteria
Dark Animus defeated
Defeat Sludgefist after he collides with pillars in Dirtflap's preferred order in Castle Nathria on Normal difficulty or higher.
Criteria
Pillars destroyed
Defeat Sire Denathrius after removing Burden of Sin from all players before March of the Penitent is cast in Castle Nathria on Normal difficulty or higher.
Criteria
Burden of Sin cleared
List of Bosses, Tactics and Loot from each of them
Let's take a close look at the bosses we have to fight:

Shriekwing
Tasked with guarding the great hall of Sire Denathrius, the blind Shriekwing locates her prey with sound and smell. The last sound heard by trespassers in Castle Nathria's halls is the monster's shriek as she descends on her prey.
Tactics
DPS –
Players within Shriekwing's line of sight will take heavy damage from [Earsplitting Shriek].
Position carefully while affected by [Echolocation].
Avoid being detected by [Echoing Sonar] while Shriekwing is under the effects of [Blood Shroud].
Tank –
Coordinate with another player to manage the effects of [Exsanguinating Bite].
Players within Shriekwing's line of sight will take heavy damage from [Earsplitting Shriek].
Avoid being detected by [Echoing Sonar] while Shriekwing is under the effects of [Blood Shroud].
Healer –
Players within Shriekwing's line of sight will take heavy damage from [Earsplitting Shriek].
Players with high applications of [Exsanguinated] receive reduced healing.
Avoid being detected by [Echoing Sonar] while Shriekwing is under the effects of [Blood Shroud].
Phase One - Thirst for Blood
Shriekwing feasts on her victims and becomes engorged with blood as the battle rages. In the boss location has four pillars placed around the centre of the room. When boss castin Earsplitting Shriek (this ability is cast twice per phase) better to hide behind the same pillar for all players in the group. Players will also be debuffed with Sanguine Ichor and effect damage over 8 seconds.
The boss will occasionally mark up to three players with Echolocation. 8 seconds later, these players will be hit with Descent (unavoidable). They need to move to the edge of the encounter space, where are not many other players.
As Shriekwing cast Exsanguinating Bite, that apllying Exsanguinated (stack 10 times) on tank, he need to coordinate with other players to trying reduce outcome. Healers should ensure they are fully topped before the ability is used and the other tank should taunt as soon as the cast is finished.
There Blind Swipe cast to a random raid member, but it has the low damage and can be simply healing with efficient AoE healing spells.
Also Shriekwing casts Wave of Blood. Healers should check it and don't lose time and cooldowns for it, because it might aligns with other sources of raid damage
Phase Two - Terror of Castle Nathria
Shriekwing gains energy for around 110 seconds, and after that transi into phase two. Teleport to the middle of the encounter space and cast Blood Shroud. This gives the boss a large damage taken decrease whilst placing a 12 yard ring around. Any players who enter this ring will be horrified for 4 seconds and be marked for a Deadly Descent after 5 seconds.
Three times during phase two, the boss will cast Earsplitting Shriek. Same cast - line of sight of the boss and horriefied effect Deadly Descent after 5 seconds.
Several slow moving rings Echoing Sonar will be released by the boss. Any player who comes into contact with a sonic ring will be horrified for two seconds and have their location marked for a Deadly Descent after 5 seconds.
Murder Prey – Shriekwing instantly kills players within 12 yds.
Loot
Gear
Slippers of the Forgotten Heretic - Cloth Feet
Errant Crusader's Greaves - Plate Feet
Cowled Batwing Cloak - Back
Chiropteran Leggings - Leather Legs
Double-Chained Utility Belt - Mail Waist
Skulker's Wing - Trinket
Conduits
Unending Grip Death - Knight: Finesse
Demonic Parole Demon - Hunter: Finesse
Mental Recovery - Priest: Finesse
Totemic Surge - Shaman: Finesse
Shade of Terror - Warlock: Finesse
Disturb the Peace - Warrior: Finesse

Altimor the Huntsman
Sire Denathrius seldom engages in the hunts himself, but Altimor makes certain the master has the finest beasts should he ever choose to indulge. Margore, Barghast, and Hecutis has been trained longer than most beasts have existed, and each is ready to deliver the Huntsman's wrath to any in his domain.
Tactics
DPS –
Position yourself when marked for [Sinseeker].
Utilizie crowd control on [Shades of Bargast] to apply stacks of [Destablize].
Position yourself when affected by Hecutis' [Petrifying Howl].
Tanks –
Margore's [Jagged Claws] inflicts significant Phsyical damage and applies a potent stacking bleed effect.
Minimize damage taken by [Rip Soul and position Bargast to avoid granting Altimor [Devour Soul].
Coordinate with your healers to manage Hecutis' [Crushing Stone].
Healer –
[Spreadshot] inflicts consistent raid damage.
Bargast's [Rip Soul creates souls that can be healed before they reach Altimor.
[Crushing Stone] inflicts substantial raid damage when Hecutis' moves.
Huntsman Altimor casting mainly few abilities
Spreadshot – Altimor fires a cone of bolts at players inflicting Physical damage.
Sinseeker – Altimor marks 3 players and fires at them. Each bolt inflicts Physical damage and an additional Shadow damage every 2 sec for 30 sec to the marked player and any players in a line.
Huntsman's Bond – The boss will summon three pets throughout the encounter. 100% of damage taken by Altimor and his hunting gargons is additionally taken by the other.
But his pets are a way to keep players busy. Here they are:

Margore
Tanks should taunt off of one another to keep the Jagged Claws stacks low (around 3-4 stacks and as this debuff is a bleed, it can be removed via bleed removal spells and abilities).
Be ready to stack on the player marked for the Vicious Lunge - mark a random non-tank player for 6 seconds, placing a 6 yard targeting circle around them. The damage of this ability isn't particularly high, generally only requiring around 15-20% of your raid to help spread the damage to survivable levels.

Bargast
Shades of Bargast – Bargast creates shades of itself that cast Deathly Roar. While under a loss of control effect Shades of Bargast gain stacks of Destabilize, increasing all damage taken by 100%. As to prevent accidental crowd control breaking, recommended that Bargast is moved to the side of the room before each Shades of Bargast cast as to spawn the adds out of accidental cleave range.
Rip Soul – Bargast rips out the soul of a player, inflicting Shadow damage and causing a soul to appear that drifts toward Altimor until it is healed to full. The soul add spawned is friendly to players and will be removed when it is healed to full. This should be the healer's number one priority.

Hecutis
Crushing Stone – Hecutis' melee attacks increase his Physical damage done by 25% and reduce his movement. While moving, Hecutis sheds stacks of Crushing Stone and triggers Shattering Stone, inflicting Nature damage to all players. The only way to remove this debuff is to move Hecutis, as whilst moving he shreds one stack every couple seconds. Each stack dropped triggers Shattering Stone which deals moderate nature damage to the entire raid.
Petrifying Howl – Hecutis petrifies players, inflicting Nature damage and reducing movement speed by 5% every 1 sec. When this effect expires, petrified players shatter inflicting Nature damage to players within 10 yards and create a patch of Stone Shards at their location. Players afflicted with Petrifying Howl debuffs should move away from the raid to the edge of the encounter space as to place the Stone Shard pools in low traffic locations.
When Hecutis is defeated, Altimor will be at around the 10% health mark. There will not be any additional phases or extra abilities, so players can just finish him.
Loot
Gear
Hellhound Cuffs - Plate Wrist
Grim Pursuant's Maille - Cloth Wrist
Master Huntsman's Bandolier - Mail Chest
Charm of Eternal Winter - Neck: Haste/Mastery
Spell-Woven Tourniquet - Leather Waist
Bargast's Leash - Trinket
Weapon Tokens
Mystic Anima Spherule - Hunter, Mage, Druid
Legendary Recipes
Memory of the Natural Order - Druid: Guardian
Memory of Eagletalon's True Focus - Hunter: Marksmanship
Memory of the Spiritwalker's Tidal Totem - Shaman: Restoration
Conduits
Rushed Setup - Rogue: Finesse
Born of the Wilds - Druid: Finesse
Tactical Retreat - Hunter: Finesse
Lingering Numbness - Monk: Finesse
Crippling Hex - Shaman: Finesse
Cacophonous Roar - Warrior: Finesse

Hungering Destroyer
The devourers consume anima wherever they can find it. With drought afflicting the Shadowlands, it is no surprise that the hungriest and most dangerous of the devourers is drawn to the abundant store of anima here in the depths of Castle Nathria.
Tactics
DPS –
[Gluttonous Miasma] prevents all healing received by afflicted targets but siphons health from afflicted targets' nearby allies.
Position yourself to avold hitting other players when targeted by [Volatile Ejection].
Move away from the Hungering Destroyer when it casts [Consume].
Tanks –
Coordinate with your co-tank to manage [Growing Hunger].
Move away from the Hungering Destroyer when it casts [Consume].
Healer –
[Gluttonous Miasma] prevents all healing received by afflicted targets but siphons health from afflicted targets' nearby allies.
Position yourself to avold hitting other players when targeted by [Volatile Ejection].
Move away from the Hungering Destroyer when it casts [Consume].
Gluttonous Miasma - These 24 second long debuffs deal low shadow damage every second and make the target immune to incoming healing. This immunity does not apply to shielding spells. Damage from anyone within 5 yards every second. In order to gain health, the debuffed player will need at least 3 players to start healing at a reasonable rate. The more people that are added, the more healing they will receive.
Hungering Destroyer will frequently mark 3 players with Volatile Ejection. Moments later, each player will have a large line shot in their direction, dealing moderate shadow damage to any player in its path. This passes through the player and will only stop once it hits the wall. Marked players need to move away from any Gluttonous Miasma clumps they may be part of and then stand still. If a player is struggling to move from the path the ejection will take, they should instead simply take a single hit, rather than potentially moving around into a position where they may be hit by 2.
Expunge – The Hungering Destroyer excites the life energy in all players causing them to erupt, inflicting Shadow damage to nearby players. The size of the effect increases based on the target's missing health. After 5 seconds, each player will take a moderate burst of shadow damage and will splash (radius is dependent on the players current percent health) this damage onto any player nearby. Better to spread out quickly upon receiving the debuff, this ability is not very dangerous as the individual damage players take isn't too high.
The boss gains energy over time. After gaining full energy, he will cast Consume. The closer you are to the boss during this channel, the more health the boss leeches from you. Before the boss gains full energy, he should be dragged to the edge of the room and all players should be ready to generate a large amount of distance between themselves and the boss.
Loot
Gear
Consumptive Chainmail Carapace - Mail Chest
Epaulettes of Overwhelming Force - Plate Shoulder
Endlessly Gluttonous Greaves - Plate Legs
Volatile Shadestitch Legguards - Leather Legs
Helm of Insatiable Appetite - Mail Head
Miasma-Lacquered Jerkin - Leather Chest
Cinch of Infinite Tightness - Cloth Waist
Gluttonous Spike - Trinket
Consumptive Infusion - Trinket
Weapon Tokens
Venerated Anima Spherule - Paladin, Priest, Shaman
Legendary Recipes
Memory of Gorefiend's Domination - Death Knight: Blood
Memory of the Wall - Warrior: Protection
Conduits
Spirit Drain - Death Knight: Finesse
Cryo-Freeze - Mage: Endurance
Tumbling Technique - Monk: Finesse
Move with Grace - Priest: Finesse
Cloaked in Shadows - Rogue: Endurance

Artificer Xy'Mox
Not everyone in Castle Nathria is loyal to Sire Denathrius. Some simply saw an opportunity and exploited it to their own ends. Artificer Xy'mox has worked with Denathrius but is mostly concerned with getting the better end of the deal, which may require the end of Nathria's invaders.
Tactics
DPS –
Coordinate with allies to place wormholes created by [Dimensional Tear].
Utilize womrholes created by [Dimensional Tear] to quickly reposition.
Seeds of Extinction created by [Root of Extinction] can be picked up and moved.
Tank –
Utilize womrholes created by [Dimensional Tear] to quickly reposition.
[Glyph of Destruction] inflicts substantial Arcane damage to nearby players.
Healer –
Coordinate with allies to place wormholes created by [Dimensional Tear].
Utilize womrholes created by [Dimensional Tear] to quickly reposition.
[Hyperlight Spark] and [Glyph of Destruction] inflict damage to all players.
Phase One - Crystal of Phantasms - 100% - 70% Health
Xy'mox activates the crystal, releasing Fleeting Spirits that fixate players and attempt to possess them. Fleeting Spirits will dissipate if they are unable to reach their target within 11 sec.
Cast Dimensional Tear wormholes in the far east and far west. The raid should be positioned around one of these wormholes. Players can travel between wormholes.
Phase Two - Root of Extinction - 70% - 40% Health
Xy'mox activates the root, planting 8 Seeds of Extinction. After 20 sec the seeds explode inflicting Nature damage to players within 50 yards. Players can interact with seeds to move them.
Same Dimensional Tear
Spot heal any player afflicted with Witheri Withering Touch
Phase Three - Edge of Annihilation - 40% - 0% Health
Xy'mox activates the Edge of Annihilation, causing it to draw players in with increasing intensity until it erupts, inflicting Shadow damage to all players within 25 yards.
Same Dimensional Tear, but now it’s in the middle of the room.
Aura of Dread – The Edge of Annihilation's presence inflicts Shadow damage to all players every 3 sec. Try to stay in close group, so healers can heal everyone.
Loot
Gear
Greaves of Enigmatic Energies - Mail Legs
Precisely Calibrated Chronometer - Leather Wrist
Shadewarped Sash - Cloth Waist
Hyperlight Band - Ring: Versatility/Mastery
Breastplate of Cautious Calculation - Plate Chest
Glyph of Assimilation - Trinket
Weapon Tokens
Apogee Anima Bead - Shield or Off-hand - Warrior, Paladin, Priest, Monk
Legendary Recipes
Memory of the Last Emperor - Monk: Windwalker
Memory of the Core of the Balespider - Warlock: Demonology
Conduits
Born Anew - Druid: Finesse
Markman's Advantage - Hunter: Endurance
Tempest Barrier - Mage: Endurance
Clear Mind - Priest: Finesse
Accrued Vitality - Warlock: Endurance
Other
Portable Pocket Dimension - 32 Slot Bag
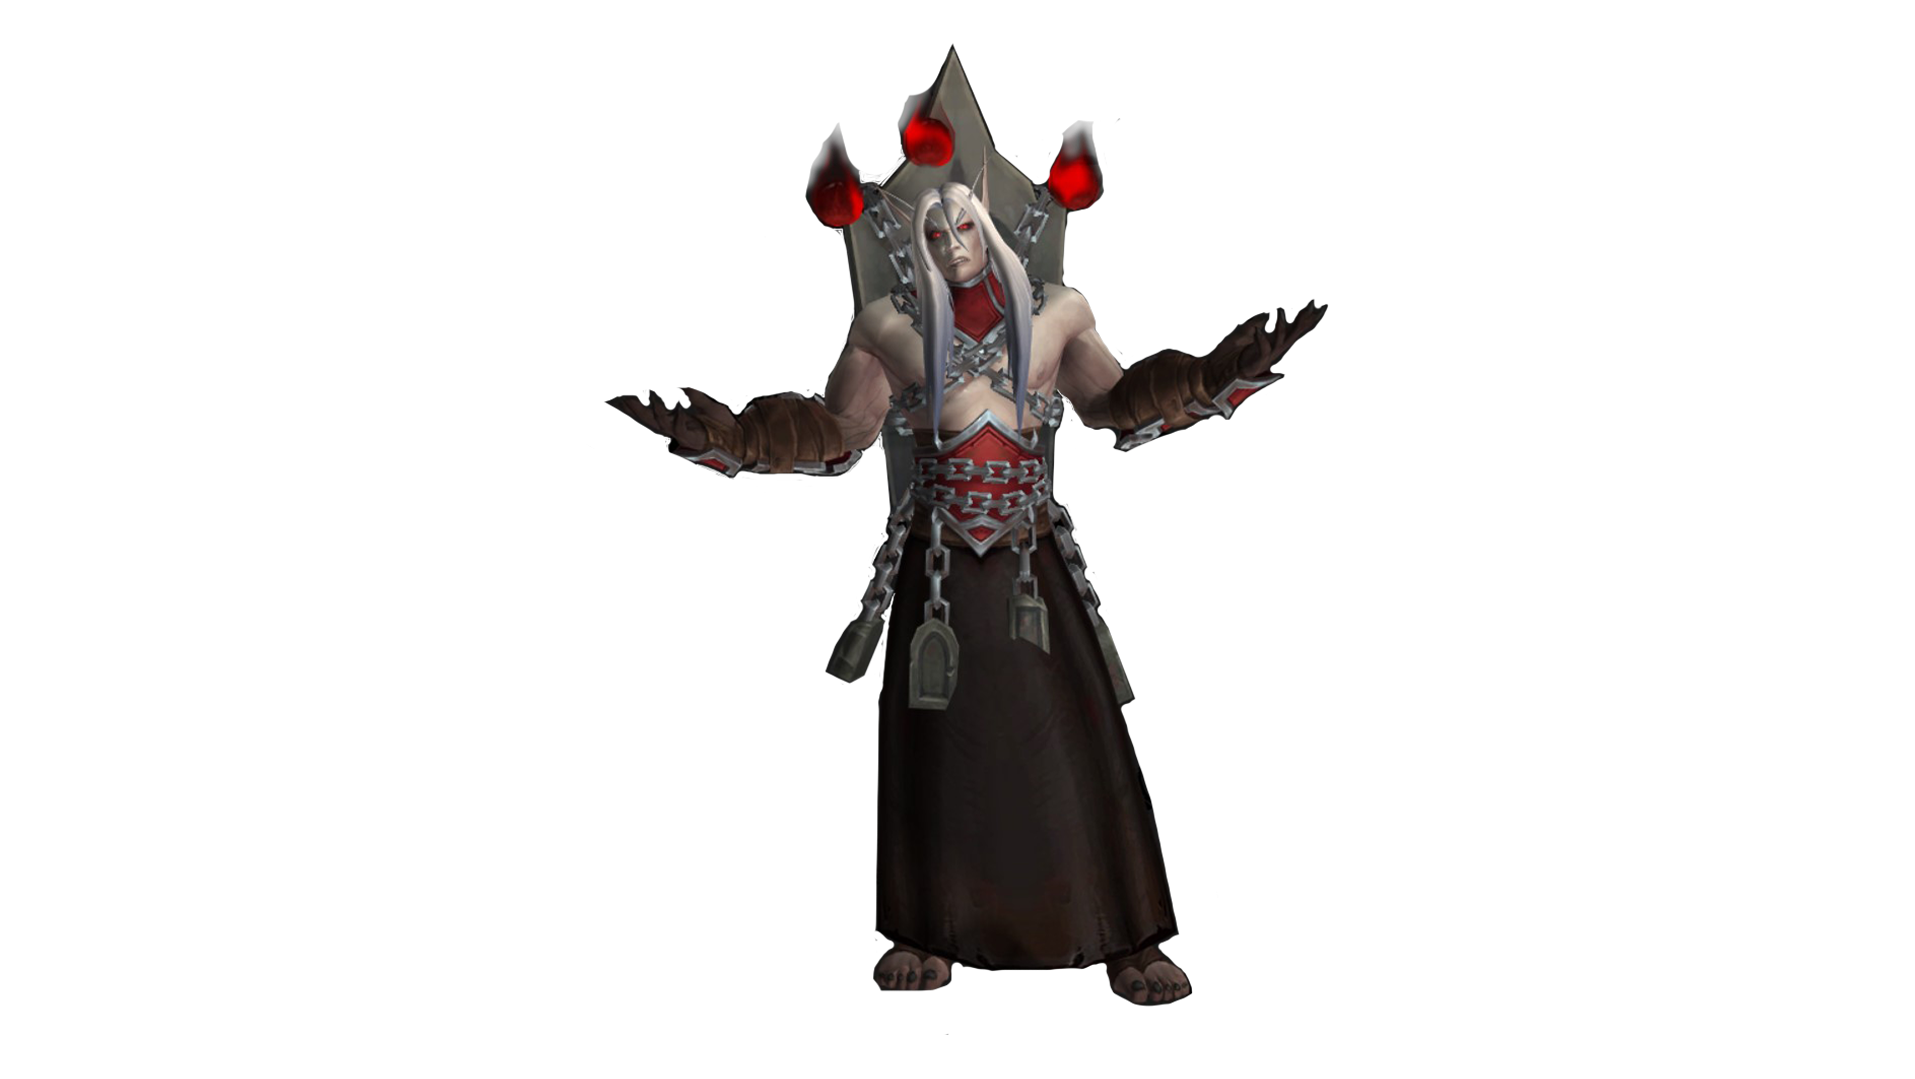
Sun King's Salvation
Kael'thas Sunstrider, former Lord of the Blood Elves, has found himself in Revendreth after his death in Magister's Terrace, atoning for his sins in life. It is currently not known what Kael'thas has been up to in Revendreth, but according to his dungeon journal entrance, Kael'thas is being tortured by Sire Denathrius to become a weapon to fight for the corrupt Master of Revendreth, and we save him from such a fate.
Tactics
DPS –
DPS should focus on killing any assassin casting Return to Stone to prevent this healing.
Tank –
Deal with Greater Castigation.
Tanks should taunt off of each other when their Burning Remnants stacks expire (applied via Fiery Strike).
Healer –
Heal Kael'thas Sunstrider as much as possible.
Keep an eye on players channelling Soul Infusion, as it deals incredibly high damage to the player towards the end of the channel.
Try to heal Essence Font to save the time of the raid.
One of the healers need to collects all of Infuser's Orbs in a staggered fashion as to extend the duration of the effect for as long as possible.
As it was mentioned - we have to save Kael'thas Sunstrider’s soul, so need to heal him, instead of kill. Heal as much as possible, even players can use Soul Pedestal to sacrifice their own health to him.
Phase one
There are 6 different types of adds. All adds should be grouped up together as much as possible, as to allow the DPS to cleave them down quickly and easily.
Rockbound Vanquisher
Concussive Smash deals moderate physical damage to all players and grants a stack of Reverberation to the vanquisher, increasing damage dealt by Concussive Smash by 25% and this stacks.
Vanquishing Strike deals a burst of physical damage to the tank and applies a stack of Vanquished: a bleed which lasts 20 seconds and can stack.
Bleakwing Assassin
Crimson Flurry marks several players. Moments later the assassin will teleport to each of these players dealing damage and applying a nasty bleed debuff to all players within 8 yards of the marked target.
Cast Return to Stone when they reach ~30% health. This 8 second cast causes the add to stand completely still and will restore them to full health upon completion.
Vile Occultist
Vulgar Brand is an interruptible spell cast occasionally by these adds. Deals a small burst of shadow damage and applies a 35% damage taken debuff to a random player for 15 seconds. This debuff can be dispelled as a magic effect.
Scornful Blast deals moderate shadow damage to a random player after a 1.5 second long interruptible cast.
Door of Shadows is an uninterruptible spell cast occasionally that will teleport the Vile Occultist to a random nearby location. This spell can be interrupted via crowd control.
When you defeat Vile Occultist, he will spawn an Essence Font. This is a friendly NPC that will slowly lose health over time as it lays on the floor. If the Essence Font dies, nothing happens. If it is healed to full, it will despawn and heal Kael'thas Sunstrider for 1% of his maximum health.
Pestering Fiend
Cast Shattering Ruby at random players, dealing low physical damage to that player and anyone within 3 yards. Displacement spells should be used on these adds as to group them together.
Soul Infuser
Kill them before they reach Kael'thas Sunstrider and cast Soul Infusion. When those adds reaching Soul Pedestal they will channel Soul Infusion. It can be interrupted via crowd control, but this will only stop them for as long as the crowd control is active.
After death Soul Infuser drops an Infuser's Orb which is an interactable object. Clicking on the orb will grant the player the Infuser's Boon debuff which increases healing done by 50% for 14 seconds. Once an orb has been interacted with it will despawn, only allowing a single player to use an orb.
High Torturer Darithos
This add is present at the beginning of the encounter and will never respawn.
Occasionally channel Greater Castigation, dealing moderate shadow damage to random selected players and anyone within 6 yards every 0.5 seconds over 6 seconds.
Phase Two
Occur at 40% & 90% of Kael'thas Sunstrider remaining health. Kael'thas Sunstrider cannot be healed by players during this phase.
Shade of Kael'thas
This mini-boss will spawn with 60% health the first time and 10% health the second time. Whilst this mini-boss is active, Kael'thas Sunstrider is immune to all healing done from players. However, damage taken by this add heals Kael'thas Sunstrider during this phase.
Fiery Strike - The Shade of Kael'thas will frequently cast Fiery Strike, dealing moderate fire damage and applying Burning Remnant debuffs to all players within a 12 yard cone directed at the tank.
Blazing Surge - When Kael'thas get 100 energy, he casts Blazing Surge, which deals a moderate burst of fire damage to all players within a large 40 yard frontal cone directed at the tank. Allowing players to sidestep the ability.
Reborn Phoenix
These adds will fixate random players and move towards them. If they reach a player they simply melee hit for a small amount of physical damage via Smoldering Plumage. This also leaves behind a Smoldering Remnants patch, a pool of fire which deals high ticking damage to players who stand in it. Once an add dies, it will slowly regenerate health over time. During this time the add cannot be damaged. Upon reaching full health it will reactivate and start chasing players again. But as this phase not so long, the raid should only need to kill the Reborn Phoenix adds a single time.
A random non-tank player is occasionally marked with Ember Blast. After 5 seconds, that player will take lethal fire damage and receive 6 stacks of Lingering Embers. This ability also spawns a patch of Smoldering Remnants. This one should be soaked ~10 yards away from the raid as to ensure the fire spawns in low traffic areas.
Loot
Gear
High Torturer's Smock - Cloth Chest
Bangles of Errant Pride - Mail Wrist
Mantle of Manifest Sins - Back
Stoic Guardsman's Belt - Plate Belt
Bleakwing Assassin's Grips - Leather Hands
Splintered Heart of Al'ar - Trinket
Tuft of Smoldering Plumage - Trinket
Soul Igniter - Trinket
Weapon Tokens
Abominable Anima Spherule - Weapon - Death Knight, Warlock, Demon Hunter
Legendary Recipes
Memory of the Sun King - Mage: Fire
Memory of the Shadowbreaker - Paladin: Holy
Conduits
Hardened Bones - Death Knight: Endurance
Fel Defender - Demon Hunter: Endurance
Cheetah's Vigor - Hunter: Finesse
Shielding Words - Paladin: Endurance
Vital Accretion - Shaman: Endurance
Brutal Vitality - Warrior: Endurance

Lady Inerva Darkvein
Shown during the Revendreth storyline as one of Sire Denathrius' most loyal advisors, Inerva is responsible for monitoring Denathrius' anima reservoirs.
Tactics
DPS –
Sins of the Past summoned by [Sins and Suffering] constantly damage the nearest player until they are connected with the beams of [Shared Suffering].
If any container reaches capacity, a [Container Breach] occurs.
[Bottled Anima] will trigger a burst of [Unleashed Volatility] if not caught.
When you have [Shared Cognition], you take damage based off the damage the tank takes from [Expose Desires].
Tanks –
Lady Inerva Darkveins' [Expose Desires] will alter your responsibilities as it gains power.
Make sure to trigger [Change of Heart] away from your allies.
Allies with [Shared Cognition] will take damage based off the damage you take from [Expose Desires].
Healer –
Allies with [Shared Cognition] will take damage based off the damage the tank takes from [Expose Desires].
Sins of the Past summoned by [Sins and Suffering] constantly damage the nearest player until they are connected with the beams of [Shared Suffering].
The raid continually suffers damage from [Loose Anima] in the chamber. This damage increases with each open container.
If any container reaches capacity, a [Container Breach] occurs.
On Lady Inerva Darkvein location placed four Primal Anima Containers, and she casted four main avilities that linked to those containers. These containers slowly gain energy over time. Upon reaching 33% & 66% energy, the ability linked with the container will gain an augmentation.
Container of Desire
The Container of Desire governs the power of Lady Inerva Darkvein's Expose Desires ability. As the container increases in level, the power of Expose Desires increases. Lady Inerva Darkvein uses these abilities when she reaches 100 energy.
Warped Desires (stackable) deals moderate shadow damage over 21 seconds. This ability is frequently cast on the tank and they should taunt off of each other on two stacks.
33% Empowerment
Expose Desires is upgraded into Expose Cognition. This applies a Shared Cognition debuff to a random non-tank player when a tank receives their first stack of Warped Desires. This ability copy damage to player that tank got for over 10 seconds. Tanks should continue to swap on two stacks as to keep damage on themselves and their Shared Cognition partner as low as possible.
66% Empowerment
Expose Desires is upgraded into Exposed Heart. This causes the tank to trigger a Change of Heart explosion whenever their Warped Desires stacks drop. The tank simply needs to move away from others to reduce incoming raid damage.
Container of Bottled Anima
The Container of Bottled Anima governs the power of Lady Inerva Darkvein's Bottled Anima ability. As the container increases in level, the power of Bottled Anima increases.
Every ~35 seconds, the boss will summon multiple Bottled Anima vials that will begin to land at randomly marked locations around the encounter space.
If no players are hit by the impact, the vial explodes and triggers Unleashed Volatility, dealing high shadow damage to all players. The raid needs to make sure that each Bottled Anima landing zone is soaked by a single player.
33% Empowerment
Bottled Anima is upgraded into Lingering Anima
When a vial lands on the ground, it now creates a patch of Lingering Anima which deals moderate shadow damage to anyone who remains within it. It’s casting randomly. It currently appears pools never despawn.
66% Empowerment
Bottled Anima is upgraded into Replicating Anima
When the Bottled Anima vial lands for the first time, it will bounce back up and mark another random nearby location and then land again moments later, forcing players to soak each vial twice, instead of once.
Container of Sin
The Container of Sin governs the power of Lady Inerva Darkvein's Sins and Suffering ability. As the container increases in level, the power of Sins and Suffering increases.
Approximately every 50 seconds, the boss will cast Lesser Sins and Suffering, spawning three Sins of the Past orbs around the middle of the encounter space. If the orbs expire after ~45 seconds, the raid receives the Indemnification debuff which deals very heavy shadow damage over 10 seconds to all players. Also three random non-tank players will be marked with Shared Suffering. Players must despawn the Sins of the Past orbs by passing at least one beam through each of them simultaneously.
33% Empowerment
Lesser Sins and Suffering is upgraded into Sins and Suffering
This modifies the Sins of the Past orbs by linking each orb together with a single Anima Web beam. Any player who is touched by this beam receives a hard hitting shadow damage 10 second dot (stackable). Try to avoid them.
66% Empowerment
Sins and Suffering is upgraded into Greater Sins and Suffering
After Anima Web beams have spawned, they will also slowly rotate on the spot.
Players who marked with Shared Suffering have to stand further away from the orb they are trying to hit with their beam. As long as the angle is the same, they are still be able to cut their orb. Other players should avoid beams.
Container of Concentrated Anima
The Container of Concentrated Anima governs the power of Lady Inerva Darkvein's Concentrated Anima ability. As the container increases in level, the power of Concentrated Anima increases.
When Lightly Concentrated Anima debuff expires, the player will deal a low burst of shadow damage to all players within 8 yards and spawns a Harnessed Specter add. Player who had it, must go close to melee to spawn the add nearby. Other players have to avoid. As it always melee hit the player in range who has the most threat. If there is no players within melee range, it will spam cast Condemn which deals very high damage to the entire raid.
33% Empowerment
Lightly Concentrated Anima is upgraded into Concentrated Anima
It applies Rooted in Anima to the player who initially received the Concentrated Anima debuff for 10 seconds, preventing them from moving at all with the debuff.
Players should to be in most acceptable area near the boss, when the ability is about to be cast, to allow the tanks quickly picked up that the add.
66% Empowerment
Concentrated Anima is upgraded into Highly Concentrated Anima
There are appear several Fragments of Shadow orbs when the debuff expires. To make dodging these orbs easier, all other players should ensure that they are 10-15+ yards away from the debuffed player, as this will give them sufficient time to dodge any incoming orbs.
Loot
Gear
Binding of Warped Desires - Plate Waist
Memento-Laden Cuisses - Mail Legs
Gloves of Phantom Shadows - Leather Hands
Confidant's Favored Cap - Cloth Head
Ritualist's Treasured Ring - Ring: Crit/Haste
Memory of Past Sins - Trinket
Weapon Tokens
Thaumaturgic Anima Bead - Shield or Off-hand - Shaman, Mage, Warlock, Druid
Legendary Recipes
Memory of a Fortified Fel Flame - Demon Hunter: Vengeance
Memory of the Mother Tree - Druid: Restoration
Conduits
Reinforced Shell - Death Knight: Endurance
Shattered Restoration - Demon Hunter: Endurance
Tough as Bark - Druid: Endurance
Rejuvenating Wind - Hunter: Endurance
Grounding Surge - Mage: Finesse
Grounding Breath - Monk: Endurance
Golden Path - Paladin: Endurance
Translucent Image - Priest: Endurance
Prepared for All - Rogue: Finesse
Spiritual Resonance - Shaman: Finesse
Resolute Barrier - Warlock: Endurance
Safeguard - Warrior: Finesse

Sludgefist
Sludgefist was born in the muddy foundation beneath Castle Nathria and now wanders the halls as he awaits orders from Sire Denathrius. His massive footsteps reverberate throughout the castle, announcing his arrival from several rooms away.
Tactics
DPS –
Sludgefist inflicts massive damage to any player caught in the path of [Heedless Charge].
Moving too far from an ally while affected with [Chain Link] will trigger [Shattering Chain].
Tank –
Sludgefist hits two targets at once with [Giant Fists].
Sludgefist triggers [Collapsing Foundation] if he impacts a wall during [Heedless Charge].
Moving too far from an ally while affected with [Chain Link] will trigger [Shattering Chain].
Healer –
[Collapsing Foundation] inflicts increasing damage to all players as the battle continues.
Moving too far from an ally while affected with [Chain Link] will trigger [Shattering Chain].
Chain Link - These players will be marked with a red arrow above their heads, allowing them to find their partner in a crowd. After 6 seconds these players will be linked together for 54 seconds. During this time they will be taking very minor physical damage every 2 seconds. If these players move 12 yards apart, the chain will break and Shattering Chain is triggered, dealing lethal physical damage to both players whilst stunning them for 6 seconds. The players must stay within 12 yards of each other until the debuff drops, ideally staying as close as possible to avoid accidentally moving too far apart when dodging certain abilities.
Sludgefist has passive attack Giant Fists. It will deal damage to closest target.
Upon reaching 100 energy, boss will mark the tank with Hateful Gaze. Sludgefist will continue to charge in this direction until he hits terrain. There are additional effects depends of which part of terrain boss reached:
If he hits a wall, he will trigger Collapsing Foundation, dealing heavy physical damage to the raid every second until the end of the encounter.
If he hits a pillar, he will trigger Crumbling Foundation, dealing very low physical damage to the raid every second until the end of the encounter. This can stack.
The raid wants to avoid triggering Collapsing Foundation by ensuring that Sludgefist always charges into a pillar.
As there are only 4 pillars in the encounter space, the raid needs to kill Sludgefist before he casts Hateful Gaze for a 5th time, otherwise Collapsing Foundation will trigger and the raid will wipe very quickly.
Destructive Stomp - Players within melee need to move away from the boss to avoid this ability. This ability also destroys any pillars within the radius.
The boss will frequently trigger Falling Rubble, marking the location underneath random ranged players. This also leaves behind a permanent Stonequake zone at the impact location, which deals damage and reduces movement speeds by 25% for anyone who stands within them.
At the beginning of the fight and every ~30 seconds after that point, the boss will cast Colossal Roar (unavoidable damage). Players should position themselves so that they are not pushed into Stonequake marked areas.
When Sludgefist gains Gruesome Rage upon reaching 30% health, increasing his attack speed and damage dealt by 20%. All players should be prepare and look at their ability cooldowns.
Loot
Gear
Load-Bearing Belt - Mail Waist
Stoneclas Stompers - Mail Feet
Impossibly Oversized Mitts - Cloth Hands
Rampaging Giant's Chestplate - Plate Chest
Heedless Pugilist's Harness - Leather Waist
Leggings of Lethal Reverberations - Cloth Legs
Colossal Plate Gauntlets - Plate Hands
Hateful Chain - Trinket
Legendary Recipes
Memory of Koltira - Death Knight: Frost
Memory of the Frenzyband - Druid: Feral
Memory of the Rylakstalker's Strikes - Hunter: Survival
Memory of a Siphoning Storm - Mage: Arcane
Memory of the Morning's Tear - Monk: Mistweaver
Memory of the Ardent Protector - Paladin: Protection
Memory of a Clear Mind - Priest: Discipline
Memory of Greenskin - Rogue: Outlaw
Memory of the Primal Lava Actuators - Shaman: Enhancement
Memory of Azj'Aqir's Cinders - Warlock: Destruction
Memory of the Berserker's Will - Warrior: Fury
Conduits
Tireless Pursuit - Druid: Finesse
Diverted Energy - Mage: Endurance
Harm Denial - Monk: Endurance
Quick Decisions - Rogue: Finesse
Fel Celerity - Warlock: Finesse
 Stone Legion Generals
The ancient stoneborn generals, Kaal and Grashaal, have hounded the Prince Renathal's rebellion at every turn. Once they were General Draven's apprentice and mentor; now their strength, strategy, and soldiers have been unleashed against him and any who would defy the Sire's will.
Tactics
The raid will be dealing with two bosses with separate health pools. During phase one, the raid fights General Kaal whilst General Grashaal attacks players from afar. During phase two, the bosses switch place, with General Grashaal fighting the raid on the ground whilst General Kaal attacks from the air. At the last stage, both bosses will fight at the same time.
Tank –
Position yourself for [Gloom Squall].
Avoid [Piercing Blur].
DPS –
Avoid [Piercing Blur].
Spread out for [Wicked Rush].
Position yourself for [Gloom Squall].
Healer –
Position yourself for [Gloom Squall].
Avoid [Piercing Blur].
Phase One
General Grashaal (Airborne)
Whilst airborne, Grashaal will frequently cast Stone Spike at random players.
Stone Breaker's Combo cast roughly every minute. This ability consists of three steps.
Step One: One random non-tank player will have Crystalize channeled into them. Player should position themselves close to the currently active boss, ready for Step Two.
Step Two: The Crystalize player will trigger a Crystalline Burst once the 5 second channel completes. Any player that has a bleed debuff, should stand within this Crystalline Burst to remove their bleed. All other players should avoid it.
Step Three: Immediately after the Crystalline Burst has occurred, the original Crystalize target will be marked with a Pulverizing Meteor. All nearby players should stack at this location to split the damage of the Pulverizing Meteor.
General Kaal (Grounded)
Every ~20 seconds, Kaal will cast Serrated Swipe at the tank, which deals a moderate burst of physical damage to them. This damage is not an area of effect spell. Tanks should look to reset their Serrated Tear stacks by using the Stone Breaker's Combo. This alone should keep the tanks stack low enough (3-4 stacks at most) to not have to taunt swap off of one another.
Occasionally apply Heart Rend debuffs to the raid, targeting up to 4 random non-tank players. When the debuff expires or is dispelled, the player receives Heart Hemorrhage (cannot be dispelled). Healers will need to spot heal them to make sure they survive.
Every 30 seconds, Kaal will mark two random non-tank players with Wicked Blade. That two players should move to that side of the boss and spread at least 8 yards apart from one another.
Phase Two
General Kaal (Airborne)
General Kaal will continue to cast Wicked Blade whilst Airborne.
Kaal will frequently throw Ricocheting Shuriken at random players, dealing a small burst of physical damage to them.
General Grashaal (Grounded)
Stone Breaker's Combo the same.
Cast Stone Fist towards the tank, dealing a burst of physical damage whilst knocking back any players within a short range frontal cone.
Every ~30 seconds, this boss casts Seismic Upheaval which marks the locations of players every few seconds. Players should move away from the zones that are spawned.
Cast Reverberating Eruption on a random non-tank player, marking them for 5 seconds.
Phase Three
The bosses must be defeated within a short time frame of one another, as once one dies the other gains a 100% damage increase via Soldier's Oath.
Stone Fist and Serrated Swipe - As two separate tank debuffs are being applied throughout this phase, the tanks will need to find a suitable time to taunt off of one another.
Positioning whilst fighting these two bosses is very important, as you need to make sure that the Wicked Blade and Reverberating Eruption mechanics do not occupy the same space.
Loot
Gear
Crest of the Legionnaire General - Back
Robes of the Cursed Commando - Cloth Chest
Wicked Flanker's Gorget - Leather Shoulder
Oathsworn Soldier's Gauntlets - Mail Hands
Ceremonial Parade Legguards - Plate Legs
Stone Legion Heraldry - Trinket
Weapon Tokens
Apogee Anima Bead - Shield or Off-hand - Warrior, Paladin, Priest, Monk
Thaumaturgic Anima Bead - Shield or Off-hand - Shaman, Mage, Warlock, Druid
Legendary Recipes
Memory of Superstrain - Death Knight: Any
Memory of the Anguish of the Collective - Demon Hunter: Any
Memory of the Circle of Life and Death - Druid: Any
Memory of the Wild Call - Hunter: Any
Memory of an Expanded Potential - Mage: Any
Memory of the Invoker - Monk: Any
Memory of the Sun's Cycles - Paladin: Any
Memory of the Twins of the Sun Priestess - Priest: Any
Memory of Bloodfang's Essence - Rogue: Any
Memory of an Ancestral Reminder - Shaman: Any
Memory of Demonic Synergy - Warlock: Any
Memory of the Tormented Kings - Warrior: Any
Conduits
Insatiable Appetite - Death Knight: Endurance
Felfire Haste - Demon Hunter: Endurance
Front of the Pack - Druid: Finesse
Harmony of the Tortollan - Hunter: Endurance
Flow of Time - Mage: Finesse
Fortifying Ingredients - Monk: Endurance
Divine Call - Paladin: Endurance
Charitable Soul - Priest: Endurance
Recuperator - Rogue: Endurance
Thunderous Paws - Shaman: Finesse
Diabolic Bloodstone - Warlock: Endurance
Stalwart Guardian - Warrior: Endurance

Sire Denathrius
Master of Revendreth, King of the Venthyr, First Blooded, Commander of the Stoneborn and the Fangs of Shadowlands. Sire Denathrius is the leader of the Venthyr covenant and ruler of Revendreth. Of the souls who atoned for all their sins, Sir Denatrius created Venthyr in his own image and likeness.
When you start your journey in Revendreth, you need to complete all the quests received from this sire. When you doing them, you will probably think that you are doing a good deed. But everything is not what it seems. In the end, it turns out that the ruler has succumbed to the temptation of power and influence, and not only can he no longer fulfill his duties, but he also threatens to destroy the fragile situation of society.
Tactics
DPS –
Echoes of Sin and Crimson Cabalists are dangerous and can overwhelm your raid if not dealt with quickly.
Remornia shares health with Denathrius through [Bloodbound].
Position carefully for [Blood Price] and [Shattering Pain], both of which knock players away from Denathrius.
Tanks –
Use [Cleansing Pain] to remove [Burden of Sin] from yourself and allies.
[Wracking Pain] greatly increases damage taken, and can also hit Crimson Cabalists.
Position carefully for [Blood Price] and [Shattering Pain], both of which knock players away from Denathrius.
Healer –
Targeted abilities like [Impale] and [Fatal Finesse] inflict heavy damage.
[Blood Price] and [Hand of Destruction] can inflict heavy damage to the entire raid.
Position carefully for [Blood Price] and [Shattering Pain], both of which knock players away from Denathrius.
Denathrius has the passive ability Inevitable.
Phase One: Sinners Be Cleansed 100% - 70% Health
The boss will occasionally mark 2 players with Feeding Time. To reduce both incoming raid damage and the amount the boss heals, the marked players simply need to move 4+ yards away from any other player.
Upon reaching 100% energy, he will cast Command: Ravage. Players need to move quickly away from this marked location and stay in close group. After a 6 second cast, Ravage goes through dealing very high damage to all players in the area. This also coats the area with Desolation pools. As the Desolation pools are permanent, the raid needs to damage Denathrius down to 70% before the third Ravage cast completes because at that point there will be no space left.
To deal with the Cleansing Pain, Burden of Sin and Blood Price mechanics, the raid should do the following:
Split the raid into two evenly sized teams. Each team should contain one tank. The teams should take turns at soaking the Cleansing Pain.
Due to the way the abilities line up, this will make it so that half the raid has different stacks than the other each time Blood Price is cast which helps keep raid damage to a minimum.
Clearing stacks in this way also spawns Echo of Sin adds in a steady and regular rate that the raid should easily be able to keep up with.
This will also leave the entire raid at 1 stack of Burden of Sin at the end of the phase, which is important for the March of the Penitent intermission.
Intermission: March of the Penitent
March of the Penitent – Upon reaching 70% health, Denathrius draws all players to the center of the room, then casts them outward to the edges. Players affected by Burden of Sin have their movement speed slowed by 20% per stack and are unable to use abilities. Moving within 16 yds of Denathrius absolves players of their Burden of Sin.
Fall of the Unworthy – After 15 sec, all players are pulled into the Observatorium along with Denathrius. Any player still affected by Burden of Sin falls to their violent, unavoidable death.
Phase Two: The Crimson Chorus 70% - 40% Health
Once fully cleansed, players find themselves in the grand Observatorium, where countless mirrors are used to watch and manipulate events throughout the Shadowlands and beyond.
From the beginning of Phase Two, a new add called Remornia will be summon. Remornia will frequently cast Impale. This marks several players for 5 seconds. All other players should avoid marked players.
Remornia abilities and melee attacks apply a stack of Carnage to the players hit. As this is a Bleed debuff, Carnage can be removed by bleed removal abilities and spells.
Whenever Denathrius reaches 100 energy, he will cast Command: Massacre. This cast resets his energy back to 0%. That turnes to Massacre casted by Remornia.
Crimson Cabalist adds will spawn in waves of 4 throughout Phase Two. Kill the Crimson Cabalist adds as a high priority. These adds should be focused down by ranged players whilst melee players focus on killing the two adds on the main path.
Hand of Destruction - Denathrius pulls all players to his location and conjures an image of himself. After 6 sec, the image releases destructive energy that inflicts Shadow damage to all players, reduced based on distance.
Phase Three: Indignation 40% - 0% Health
As soon as Phase Three begins, the boss enables Indignation. The raid should look to position themselves towards the middle of the encounter space before the intermission as to avoid being caught in this energy at any time.
Remornia had reduces attack speed by 25%, but increases his melee damage done by 50%. Each melee attack also applies a stack of Scorn to the tank.
Same Hand of Destruction, but now have no access to the mirrors. This is a good time for movement speed increasing cooldowns, as well as healing cooldowns as this ability will be dealing higher damage during this phase than in the previous due to the closer proximity to the boss.
Fatal Finesse – Denathrius sets his sights on random players, then slashes each of them 5 sec later. Inflicts Shadow damage to players within 9 yds of the target, plus an additional Shadow damage every 1 sec for 10 sec.
Smoldering Ire – On Heroic difficulty and above, Fatal Finesse leaves behind a sphere of volatile anima that explodes after 10 sec, inflicting up to Shadow damage to all players.
Upon reaching 100% energy, the boss will summon a Sinister Reflection in the middle of the encounter space.
Ravage – After 6 sec, the Sinister Reflection releases anima in a huge arc, inflicting Shadow damage to all players hit and leaving behind Desolation.
Desolation – Lingering Anima reduces all healing received by 100% and inflicts Shadow damage every 1 sec to players who stand within it.
Massacre – The Sinister Reflection forms massive blades that slash in every direction, inflicting Shadow damage to any players hit.
Rancor – When Remornia hits a player with Impale or Massacre, she scorches the area beneath them with seething hatred for 1 min. (Heroic difficulty)
Inflicts Shadow damage every 1 sec and increases damage taken by 100% for players standing within.
Loot
Gear
Pauldrons of Fatal Finality - Mail Shoulder
Sadist's Sinister Mask - Leather Head
Most Regal Signet of Sire Denathrius - Ring: Haste/Mastery
Diadem of Imperious Desire - Plate Head
Shawl of the Penitent - Cloth Shoulder
Sanguine Vintage - Trinket
Cabalist's Hymnal - Trinket
Manabound Mirror - Trinket
Dreadfire Vessel - Trinket
Weapon Tokens
Abominable Anima Spherule - Weapon - Death Knight, Warlock, Demon Hunter
Mystic Anima Spherule - Weapon - Hunter, Mage, Druid
Venerated Anima Spherule - Weapon - Paladin, Priest, Shaman
Zenith Anima Spherule - Weapon - Warrior, Rogue, Monk
Legendary Recipes
Memory of the Deadliest Coil - Death Knight: Unholy
Memory of the Chaos Theory - Demon Hunter: Havoc
Memory of Oneth - Druid: Balance
Memory of the Eredun War Order - Hunter: Beast Mastery
Memory of the Freezing Winds - Mage: Frost
Memory of a Celestial Infusion - Monk: Brewmaster
Memory of the Vanguard's Momentum - Paladin: Retribution
Memory of a Harmonious Apparatus - Priest: Holy
Memory of Finality - Rogue: Subtlety
Memory of the Demise of Skybreaker - Shaman: Elemental
Memory of a Malefic Wrath - Warlock: Affliction
Memory of the Exploiter - Warrior: Arms
Conduits
Fleeting Wind - Death Knight: Finesse
Viscous Ink - Demon Hunter: Endurance
Ursine Vigor - Druid: Endurance
Ambuscade - Hunter: Finesseф
Incantation of Swiftness - Mage: Finesse
Swift Transference - Monk: Finesse
Light's Barding - Paladin: Finesse
Light's Inspiration - Priest: Endurance
Fade to Nothing - Rogue: Finesse
Astral Protection - Shaman: Endurance
Kilrogg's Cunning - Warlock: Finesse
Indelible Victory - Warrior: Endurance
Undoubtedly, this raid will be a difficult test for most players, especially at first. If you want to save your time and nerves, we suggest enlisting the help of our best specialists and quickly complete this raid, getting both achievements and the desired items!